Installation Guide: GORE® SKYFLEX® Aerospace Tapes
Installation Guides, United States
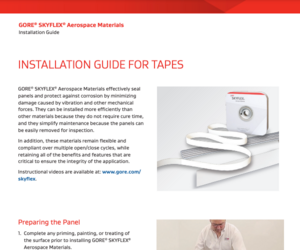
For decades, W. L. Gore & Associates has offered GORE® SKYFLEX® Aerospace Tapes which effectively seal aircraft panels and protect against corrosion. To ensure they perform optimally and minimize the damage caused by vibration and other mechanical forces, Gore's aerospace tapes must be installed properly. They do not require cure time and remain flexible and compliant over multiple open/close cycles, retaining the characteristics critical to the integrity of the application. For more information, view our instructional videos at gore.com/skyflex.
Preparing the Panel
Complete any priming, painting or treating of the surface prior to following these steps:
- Place the panel on a flat surface, allowing free access to all edges.
- Remove all old tape or other sealing materials.
- Inspect the panel edges to ensure they’re not damaged or delaminated.
- Clean the panel with a cloth and isopropyl alcohol or another appropriate cleaner.
- Refer to the aircraft’s maintenance manual and your company’s procedures for additional guidelines on panel inspection and maintenance and when selecting solvents for the removal of existing solvents.
Installing the Flat Tape
Cut the tape from the roll at a 90° angle, and beginning near but not on a fastener hole, lay the tape flat without stretching it. Carefully peel off the pressure-sensitive adhesive liner and apply light pressure, ensuring there are no creases, to press the tape along the panel’s bottom edge. To prevent the tape from lifting and avoid damage to the panel, ensure that all edges are wrapped. If you’re working with curved edges or joints, refer to the following procedures:
Curved Edges
First, refer to your aircraft maintenance manual to verify whether you can cut off excess materials along a curved edge. When forming a curve, press the tape along the longest edge of the curve without stretching it. Carefully peel off the adhesive liner. Apply light pressure and wrap the excess tape around the short edge to seal the tape around a curve, ensuring the tape’s edge is sealed properly.
Use of Joints
If a joint is required to create a seal with the tape, overlap the two ends of the tape at the corner and follow your aircraft maintenance manual for the required measurement for the overlap. Apply light pressure to the overlap, ensuring both edges of the tape are properly sealed.
Now, join the beginning and end by laying the two edges of tape away from the fastener hole, so that they overlap at your aircraft’s required length. Ensure both edges of the tape are properly sealed, and then compress the overlapped portion with scissors. Finally, use an awl or scribe to form an opening for each fastener and slowly puncture the tape over the holes.
Installing the Ribbed Tape
The tape should be cut from the roll at a 90° angle and laid flat – without stretching it – beginning near but not on a fastener hole. Peel off the pressure-sensitive adhesive, align the large rib of the tape to the edge and ensure there are no creases. All edges should also be wrapped to prevent the tape from lifting or damage occurring on the panel edge. To complete the installation, consult the specific instructions for working with curved edges, corners and joints and joining the beginning and end of the ribbed tape as previously described.
Learn More About GORE® SKYFLEX® Aerospace Materials
For questions regarding your specific application or to learn more about Gore's complete line of aerospace tapes and gaskets, contact one of our representatives today.
FOR INDUSTRIAL USE ONLY
Not for use in food, drug, cosmetic or medical device manufacturing, processing, or packaging operations.